Hi everyone!
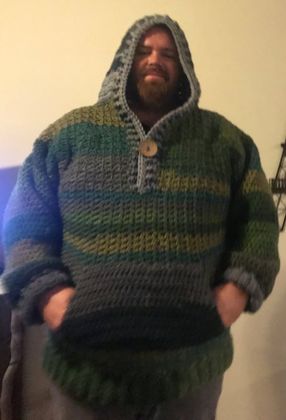
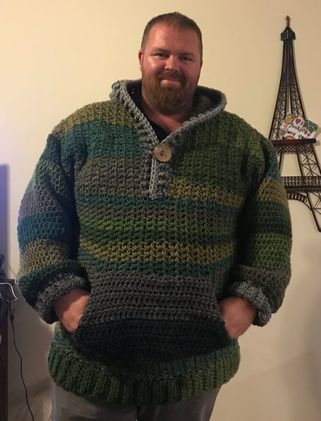
Below are photos of the hoodie I completed for my boyfriend. He loves it! He picked out the yarn and helped me customize the pattern. After posting photos online there was a lot of interest so I decided to write down what I did to create the pattern.
Please Keep in mind this is my first pattern written out and I completed the majority of the work about 4 months ago but put it aside to finish later while we were packing to move. I wish I would have taken photos while working on it to show the details but I may try to make another to show the work as you go.
I have tried to write out as much as I can remember but if you have questions or suggestions to add feel free to leave a comment below or contact me at [email protected]. I am happy to help as much as I can.
I may also try to replicate the pattern so I can write down better row by row steps so keep checking back for those steps 😃 If you create your own hoodie based on the steps below I would love to see it! You can email me a photo at the email above!
|
|
As you can see he is a big guy about 6'2 and usually wears a 2-3x Tall in shirts so the information below is for a larger sweater but could be adjusted to fit the person you are making it for.
To start the sweater I began working from the bottom up.
Things you may need:
I used 5 rolls of Caron Tea Cakes for the body and 1.5 for the hood, cuffs and pocket
8mm hook
Button (optional) This is not a functioning button for him he wanted that sewn on and closed there.
Yarn needle to weave in edges
For the bottom ribbing:
R1: Chain 8
R2: HDC in 2nd chain from hook. HDC in back loop only next 5 stitches. HDC in last stitch (7 stitches)
R3. Chain 1, HDC in first stitch. HDC in back loop only next 5 stitches. HDC in last stitch (7 stitches)
Repeat Row 3 until you have the width you want to wrap around waist area. I ended up with 76 rows of HDC. For the spider stitch below you work in groups of 2 so you want to make sure you have an even number of rows.
Join to first chain row either by sewing or slip stitch across to connect. Be careful not to twist.
Body:
I used the spider stitch to complete the body of the sweater. The link below has a great video on how to complete the stitch.
https://www.youtube.com/watch?v=pYO9ydUpz8I
To start I turned the work ribbing above to the side and worked on the side of the ribbing working into every other row.
For Rows 1-37: I completed 37 rows of spider stitch around. I did do this in the round instead of joining and chaining after each row, so if you do it in the round make sure you keep track of your starting stitches for each row.
*Note for every 2-3 rows I did add in a increase with this video around 2-3 increases per every 3rd row to expand the stomach area I tried to space them out pretty evenly around the row so every 10ish stitches I would add in an increase. My boyfriend wanted it to be tighter at the bottom then the top/middle. You could easily do the same amount all the way up I would just make sure that you measure around the widest area that way the sweater will fit and not be to tight around.
To increase I simply added an extra single crochet and chain 1 into the stitches where I wanted the increase. That would give me an extra stitch to work in the next row around.
Row38. Here is where things need to split off to make holes for the arms and the neck. To start I laid the work flat and figured out where exactly half of the sweater landed and added stitch markers. I knew I wanted the back to be one half of the work so I started there. I continued the spider stitch but this time turning the work at the end of each row when I hit the next marker continuing on for rows 38-61 to create the back panel. For me with the increases the back panel is a total of 27 spider stitches across.
After you reach row 61 you want to reconnect the yarn on the row 37 where you left off. This time measuring out the middle of the left over section. Spider stitch to the middle of the work then stop to chain and turn work. For this one it was 13 spider stitches across. Work the same spider stitches up 23 rows.
After that panel you want to go back and do the same for the other side. For me I had to skip one spider stitch and then add 13 spider stitches into the next section for it to be even. Again 23 rows up.
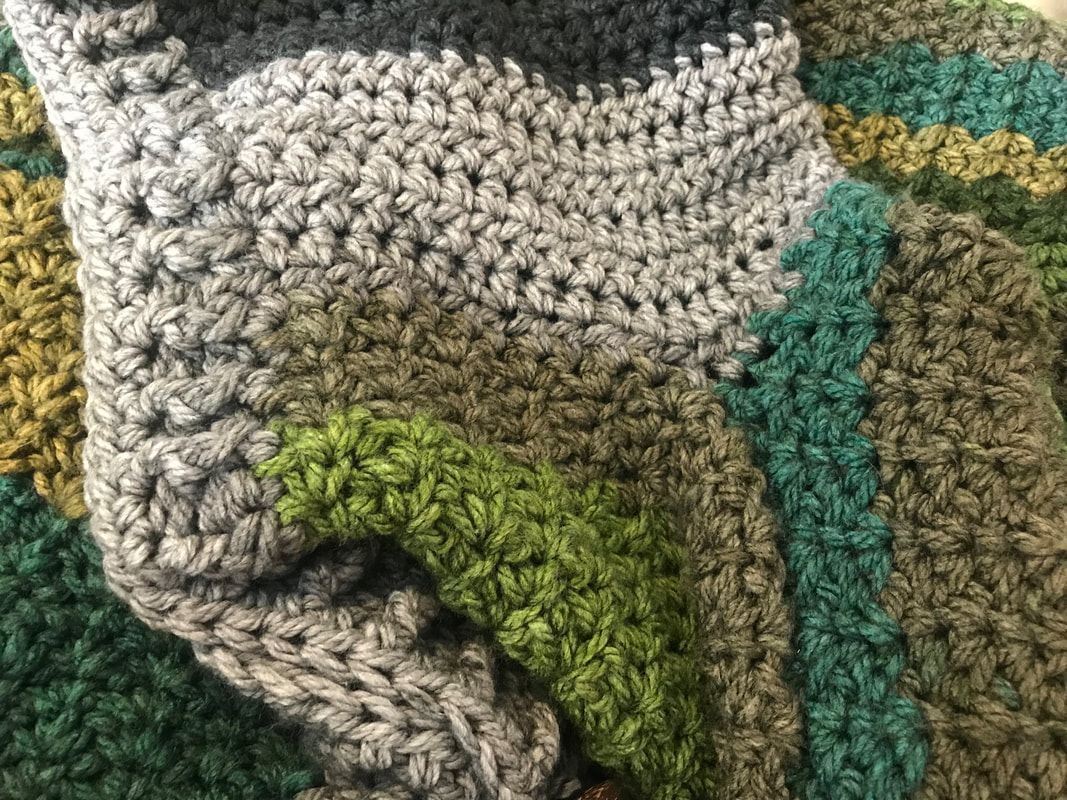
After you finish that you should have 3 separate parts off your original "tube". You want to then sew or stitch across to connect the front panels to the back. Make sure you don't stitch all the way across from the outside I only stitched together 7 spider stitches on each side from the shoulder side inward. You need the extra part left off to allow for the hood. See photo below (right) to see where it splits and works into the hood later on.
Hood:
Once you have that sewn together you want to reattach the yarn at one of the front panels to HDC in each stitch across to the other side. For me I switched to the black/ gray yarn here.
I did 19 rows total for the hood but found it to be very large, I would have probably stopped around 13-15 but he wanted the hood extra long. Once done with the last row, fold the right sides together in half and slip stitch across to join and create the hood. (photo on left below)
At this point it should look like a hooded vest.
Things you may need:
I used 5 rolls of Caron Tea Cakes for the body and 1.5 for the hood, cuffs and pocket
8mm hook
Button (optional) This is not a functioning button for him he wanted that sewn on and closed there.
Yarn needle to weave in edges
For the bottom ribbing:
R1: Chain 8
R2: HDC in 2nd chain from hook. HDC in back loop only next 5 stitches. HDC in last stitch (7 stitches)
R3. Chain 1, HDC in first stitch. HDC in back loop only next 5 stitches. HDC in last stitch (7 stitches)
Repeat Row 3 until you have the width you want to wrap around waist area. I ended up with 76 rows of HDC. For the spider stitch below you work in groups of 2 so you want to make sure you have an even number of rows.
Join to first chain row either by sewing or slip stitch across to connect. Be careful not to twist.
Body:
I used the spider stitch to complete the body of the sweater. The link below has a great video on how to complete the stitch.
https://www.youtube.com/watch?v=pYO9ydUpz8I
To start I turned the work ribbing above to the side and worked on the side of the ribbing working into every other row.
For Rows 1-37: I completed 37 rows of spider stitch around. I did do this in the round instead of joining and chaining after each row, so if you do it in the round make sure you keep track of your starting stitches for each row.
*Note for every 2-3 rows I did add in a increase with this video around 2-3 increases per every 3rd row to expand the stomach area I tried to space them out pretty evenly around the row so every 10ish stitches I would add in an increase. My boyfriend wanted it to be tighter at the bottom then the top/middle. You could easily do the same amount all the way up I would just make sure that you measure around the widest area that way the sweater will fit and not be to tight around.
To increase I simply added an extra single crochet and chain 1 into the stitches where I wanted the increase. That would give me an extra stitch to work in the next row around.
Row38. Here is where things need to split off to make holes for the arms and the neck. To start I laid the work flat and figured out where exactly half of the sweater landed and added stitch markers. I knew I wanted the back to be one half of the work so I started there. I continued the spider stitch but this time turning the work at the end of each row when I hit the next marker continuing on for rows 38-61 to create the back panel. For me with the increases the back panel is a total of 27 spider stitches across.
After you reach row 61 you want to reconnect the yarn on the row 37 where you left off. This time measuring out the middle of the left over section. Spider stitch to the middle of the work then stop to chain and turn work. For this one it was 13 spider stitches across. Work the same spider stitches up 23 rows.
After that panel you want to go back and do the same for the other side. For me I had to skip one spider stitch and then add 13 spider stitches into the next section for it to be even. Again 23 rows up.
After you finish that you should have 3 separate parts off your original "tube". You want to then sew or stitch across to connect the front panels to the back. Make sure you don't stitch all the way across from the outside I only stitched together 7 spider stitches on each side from the shoulder side inward. You need the extra part left off to allow for the hood. See photo below (right) to see where it splits and works into the hood later on.
Hood:
Once you have that sewn together you want to reattach the yarn at one of the front panels to HDC in each stitch across to the other side. For me I switched to the black/ gray yarn here.
I did 19 rows total for the hood but found it to be very large, I would have probably stopped around 13-15 but he wanted the hood extra long. Once done with the last row, fold the right sides together in half and slip stitch across to join and create the hood. (photo on left below)
At this point it should look like a hooded vest.
|

|
Sleeves:
The sleeves for me were probably the hardest part for me. My boyfriend wanted the sleeves baggy so they are probably larger than most people would want. I have never done sleeves before and defiantly would recommend looking up ideas for sleeves for your own. Below though is an idea of what I did. Remember this was a few months ago and is not exact because I tried to count out
To start I did a HDC around the sleeve area and worked in the round HDC around. I joined the yarn to the join in the armpit to start (see photo below).
He did want baggy sleeves so I only did a decrease on the last 2 stitches by crocheting doing a HDC2tog for the rows listed below.
6, 8, 9, 11, 13, 15 and 16. With rows 17 and 18 I did HDC2tog for every 10 stitches around. From here every other row or two to the end tried to work in 1-2 HDC2tog
His sleeves are a total of 32 rows of HDC. Overall I worked from a total of 53 HDC around the shoulder area down to 36 around the wrist area until the sleeve reached to his wrist.
I did add a cuff into the same way I did ribbing around the waist of the hoodie. His were 27 rows of HDC around each.
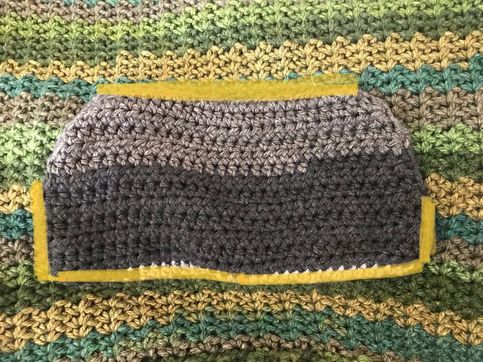
Pocket
Row 1: Chain 37
Row 2: HDC 3rd chain from hook and across (35 HDC across)
Row 3 and 4: Repeat Row 2
Row 5: Chain 2 Skip first stitch then HDC across ending with 34
Repeat row 5 decreasing one each row until you reach row 9 ending with 30 HDC at the top.
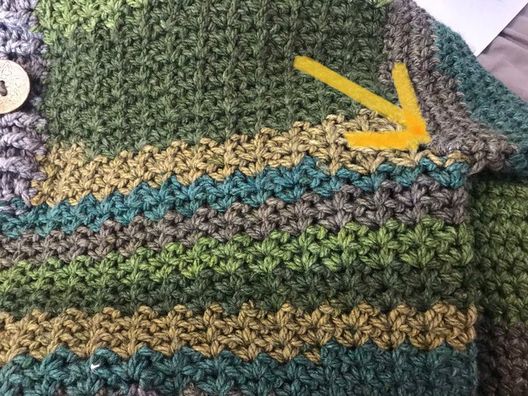
Sew onto front of hoodie where marked below in yellow
Row 1: Chain 37
Row 2: HDC 3rd chain from hook and across (35 HDC across)
Row 3 and 4: Repeat Row 2
Row 5: Chain 2 Skip first stitch then HDC across ending with 34
Repeat row 5 decreasing one each row until you reach row 9 ending with 30 HDC at the top.
Sew onto front of hoodie where marked below in yellow
Thank you for visiting my site! Please let me know if you have any questions and I will try to get back to you as soon as possible. This is my first time writing this pattern out and I would appreciate any feedback.